
We've implemented new exciting features for the SSS random walk shaders. In the while there have also been many optimizations on how sampling is used regard direct vs indirect lighting. We've discovered that for the majority of cases we don't need the extra complexity we introduce with guided (Dwivedi) sampling for indirect sampling/lighting, resulting in perceptually the same appearance while being way faster overall (ie. the little extra noise introduced with plain randomwalk is not really palpable on indirect rays).
Then because Arnold is a branched path tracer it does only one single sample for any indirect rays. While this works pretty well for most cases it does really not for subsurface scattering resulting in very coarse solutions when GI is used.
Half of the effort here has been spent to completely mitigate that and leave you in power of optimizing everything at your will, yes, we also removed that one single sample limitation and you can shot as many samples you want also during indirect GI sampling.
But let's see first the new features ! ;)
Rayleigh Scattering
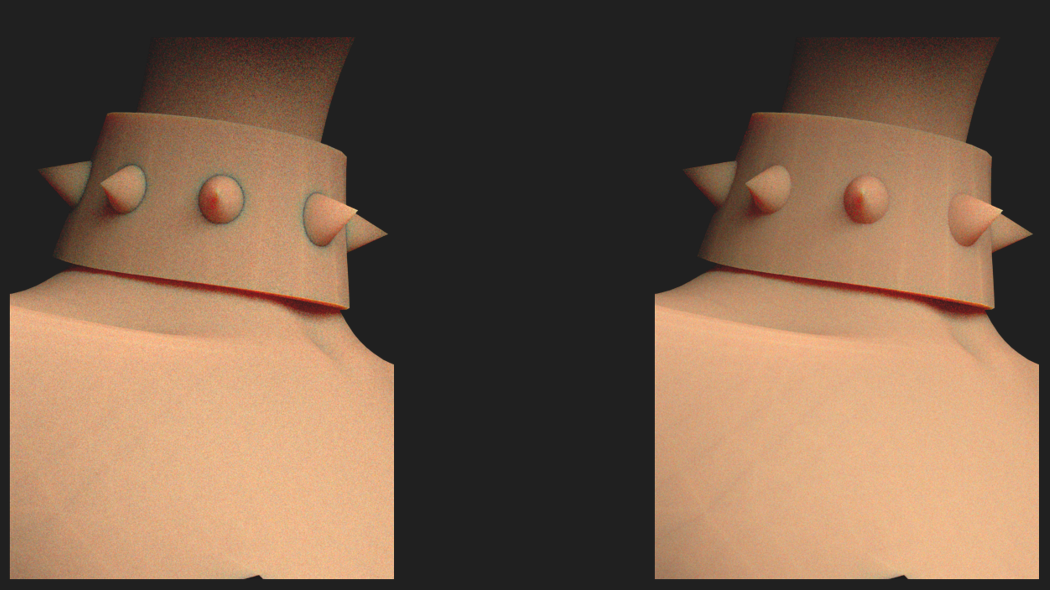
refers to the scattering of light by particles in its path of size up to one-tenth the wavelength of the light and occurs without any loss of energy or change of wavelength. It is the scattering responsible for the blue of the sky outhere (very blue today btw). With rombotools we've reparameterized and we're using it to introduce a red tint super usefull for skin rendering for example.
Below respectively we're using it at -0.75, 0 and 1.0 (same values are used in the animated GIF). See how the default SSS is getting from cold(blue) to warm(red). You can use this for both simulation or to tweak your SSS color without altering its albedo map for example or even as an extra parameter to tweak SSS color and scattering when all the others have already been used (ie. rigged with maps etc.).
Mie Scattering
The Mie phase function describes the complex shapes that arise when light is scattered by water droplets. We use a blend of HG and Draine's phase function that can accurately match 95% of the Mie phase function. This is way more physically correct than the double HG phase function introduced lately in Arnold7. It is better engaged with high anisotropy and an ad-hoc parameter called 'Mie Scattering' and works just great with the latest 'Similarity Theory' addition.
While Mie scattering is generally used for fog, clouds and skies it does a very good job also on tissues and other materials. What it does is to change the direction of the underlying random walks. As said above it works great with high anisotropy while having just one single parameter to tweak.
The Mie phase functions was somehow available also before but we had to use tabulated data that would not allow for dynamic parameter tweaking. Here we're using a latest extension (from E.d'Eon) that still has to be presented at Siggraph 2023 ! With rombotools we're always on the tech edge ;) Works also with romboSSSRefract.
Similarity Theory
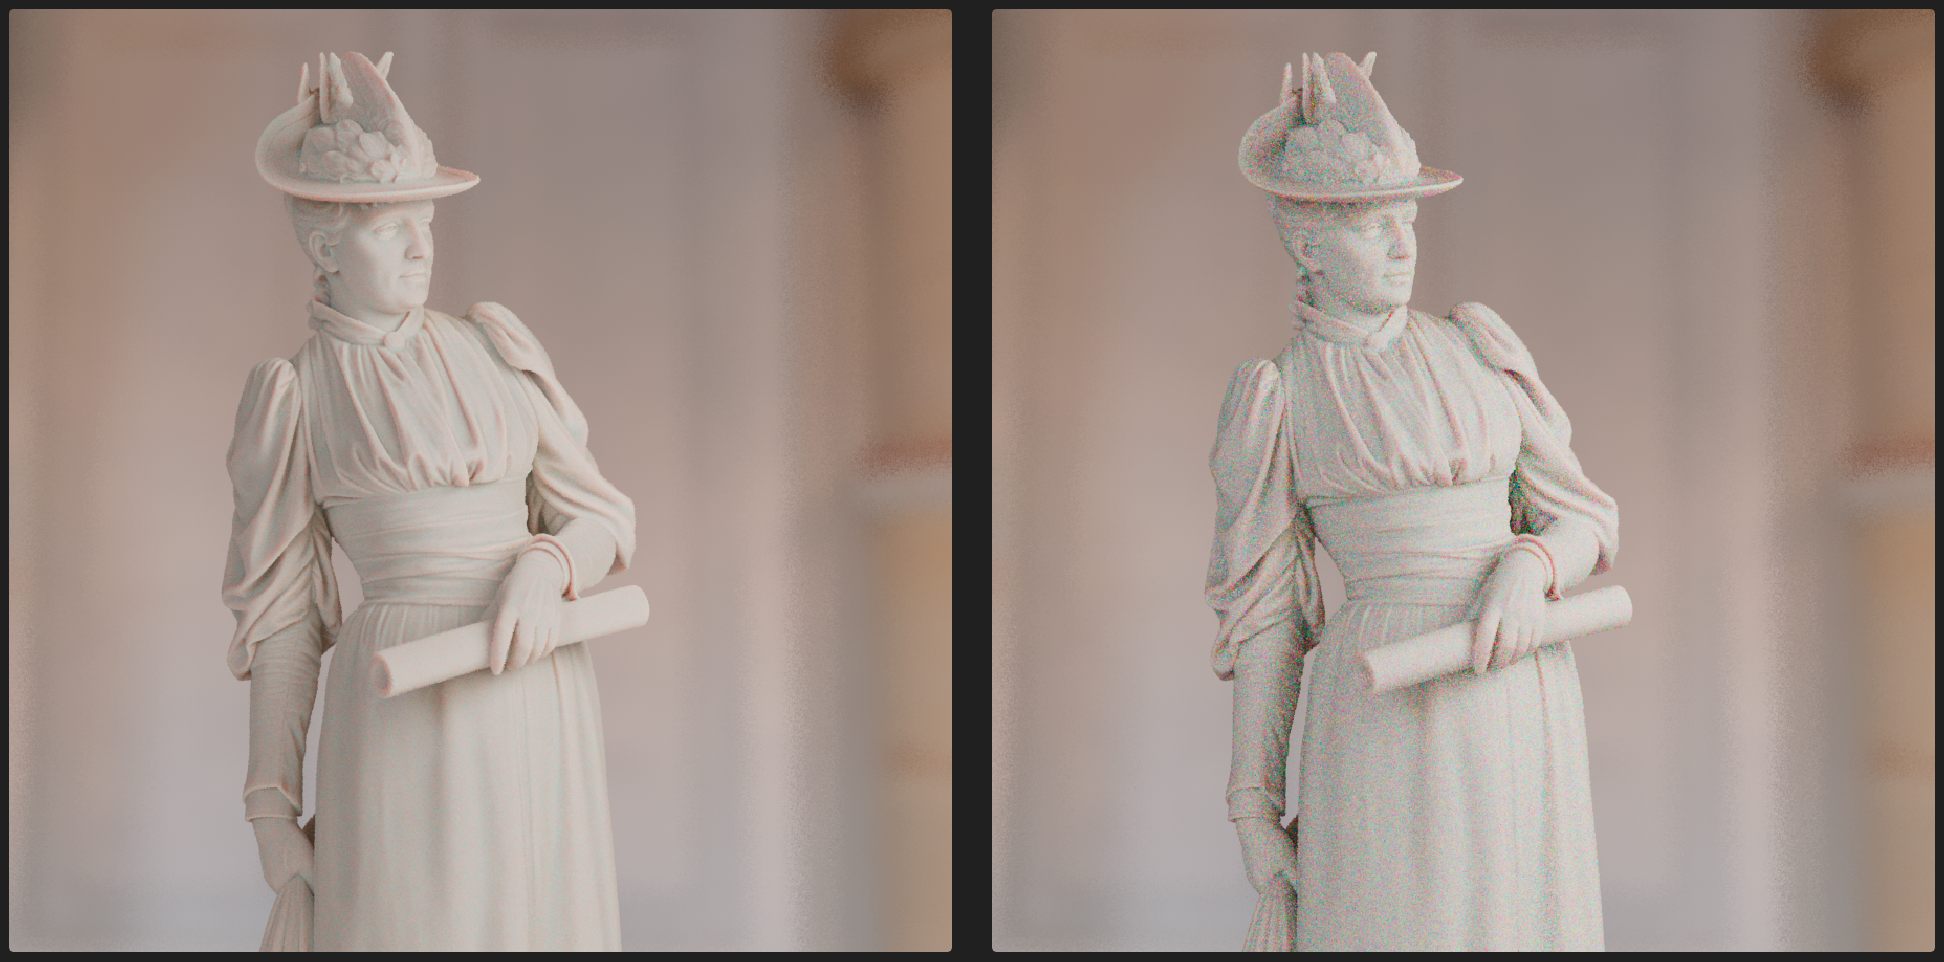
here is used to reduce the overall time spent sampling highly anisotropic SSS. The problem with high anisotropy is that we cannot use guided (Dwivedi) sampling resulting in very high times to have the SSS solution fully converged. Instead with SimilarityTheory (ST) we find similar relations between parameters so to be able to use less anisotropy for almost the same exact result perceptually while being able to use more advanced sampling to speed up and improve SSS solution quality.
Similary theory is completely automatic and does not require any user invervention. It works only when the Anisotropy parameter in the SSS randomwalk shader is increased. It can reduce overal render time by 20% while having the same visual result as before. It does boost also romboSSSRefract shader.
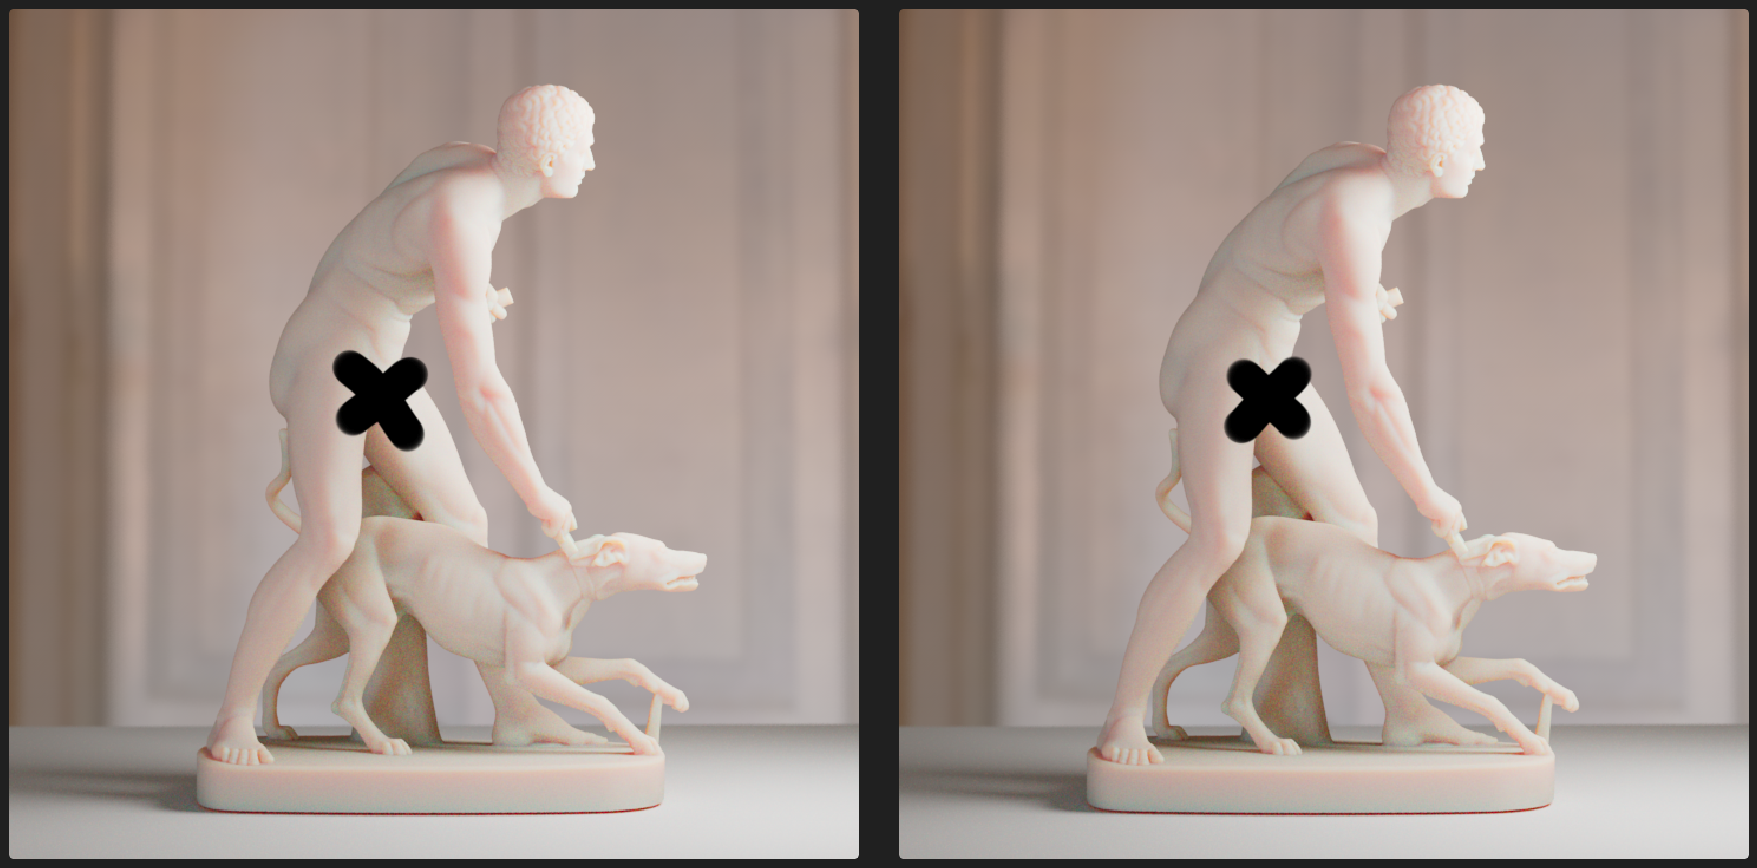
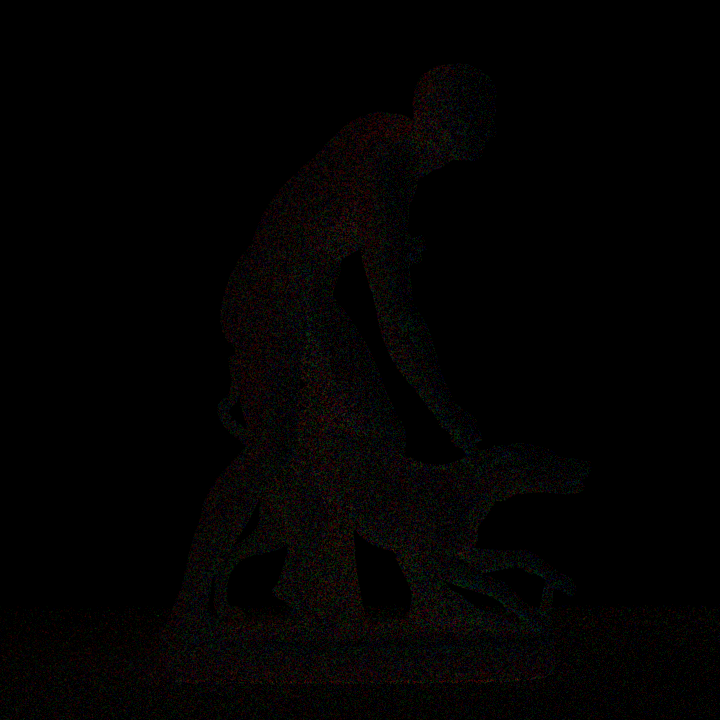
You see, perceptually results are identical. However the rendering on the right took around 5mins while the one on the left almost 7mins (at 2k). Following is the absolute difference between the two images.
Albedo Remapping
You may not know that Color and Radius for SSS are remapped parameters for native volumetric Scattering and Absorption parameters (also called Sigmas). This is because original parameters are not really intuitive to be used and you wont be able to finely control the SSS appearance with them.
Situation is that there're many remapping models. The one that Arnold and our fist SSS incarnation use are based on the Disney model from Chiang/Burley. However this remap does not support Anisotropy. Meaning that as soon as we increase the Anisotropy parameter we start losing a bit the intuitive feedback we had before with just Color and Radius.. ie. the resulting appearance is not exactly most of the time what we were looking for and we have to do a step back and further tweak Color/Radius (and maybe overall Scale) once we introduced Anisotropy.
With latest rombotools update we introduce another remapping we called 'Imageworks' from Kulla and Conty, the two authors that first introduced it. This remap will look almost identical when Anisotropy is kept low and Color and Radius does have plausible values. But it will start to diverge as soon as an high anisotropic SSS is being engaged.
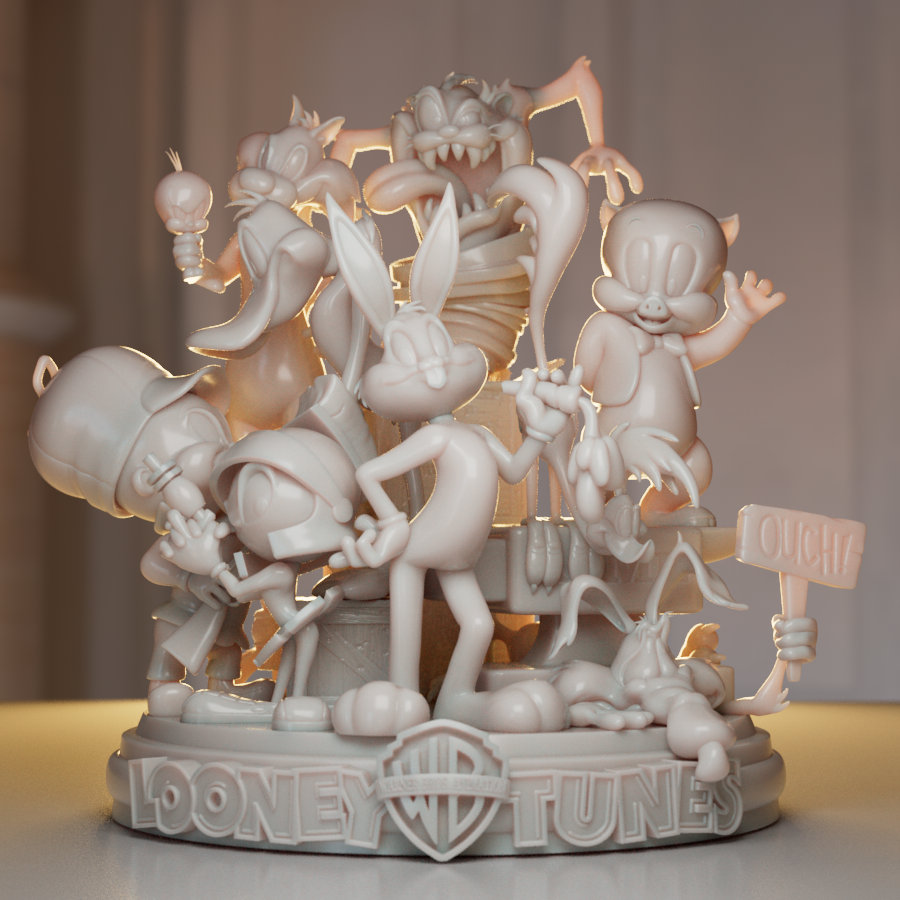
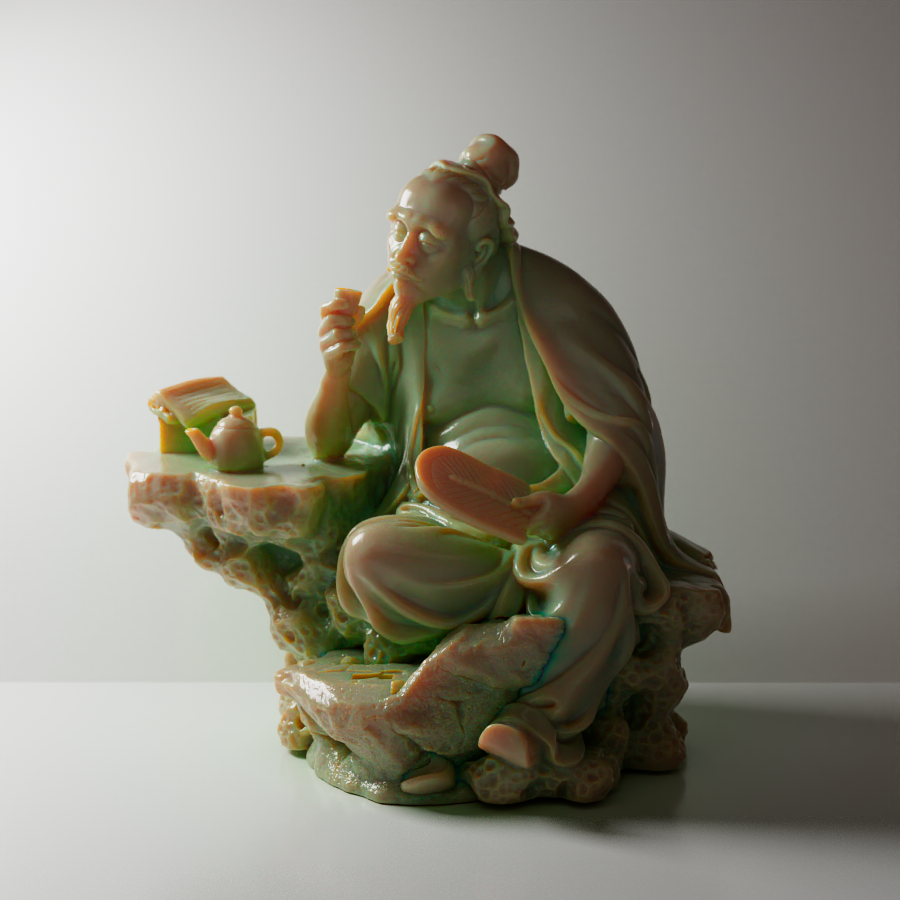
For example, let's say we have set an overall green color for the SSS and a red color for the radius.. what would you expect ? An overall green color that gets darker red as soon as the SSS rays go deeper into the model.. right ? Well this is what happens with the Conty/Kulla model that take into account also Anisotropy but not with the previous model that does not care about Anisotropy effectively resulting in a completely different SSS coloration.
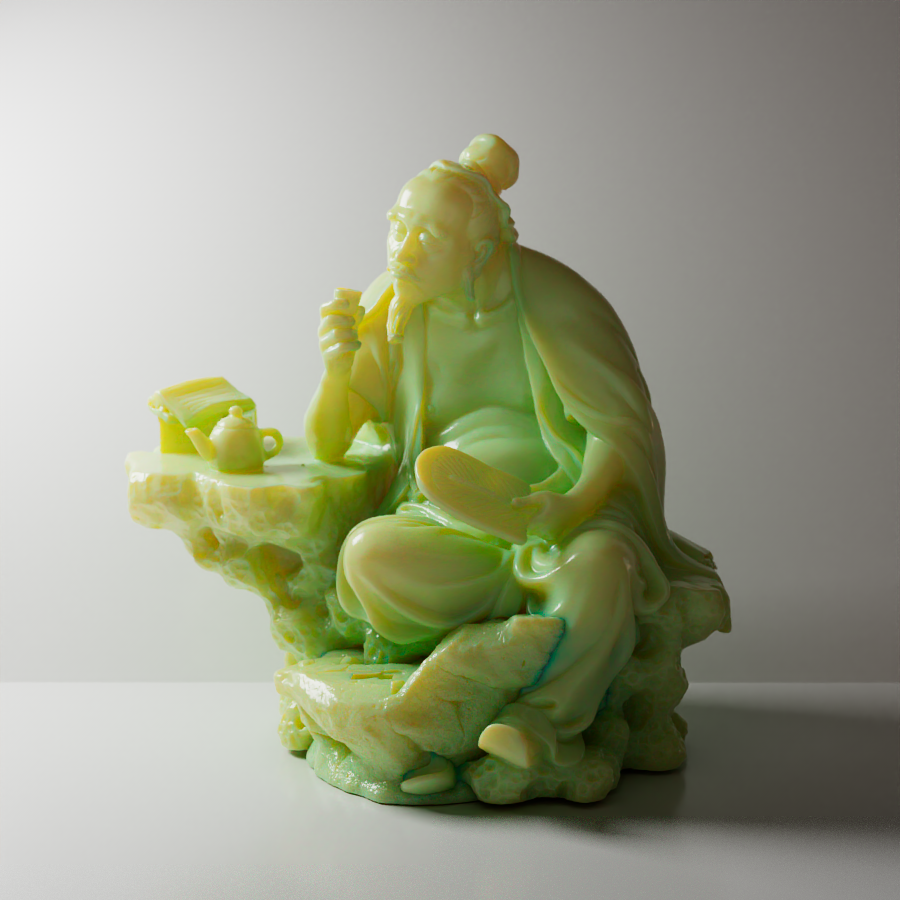
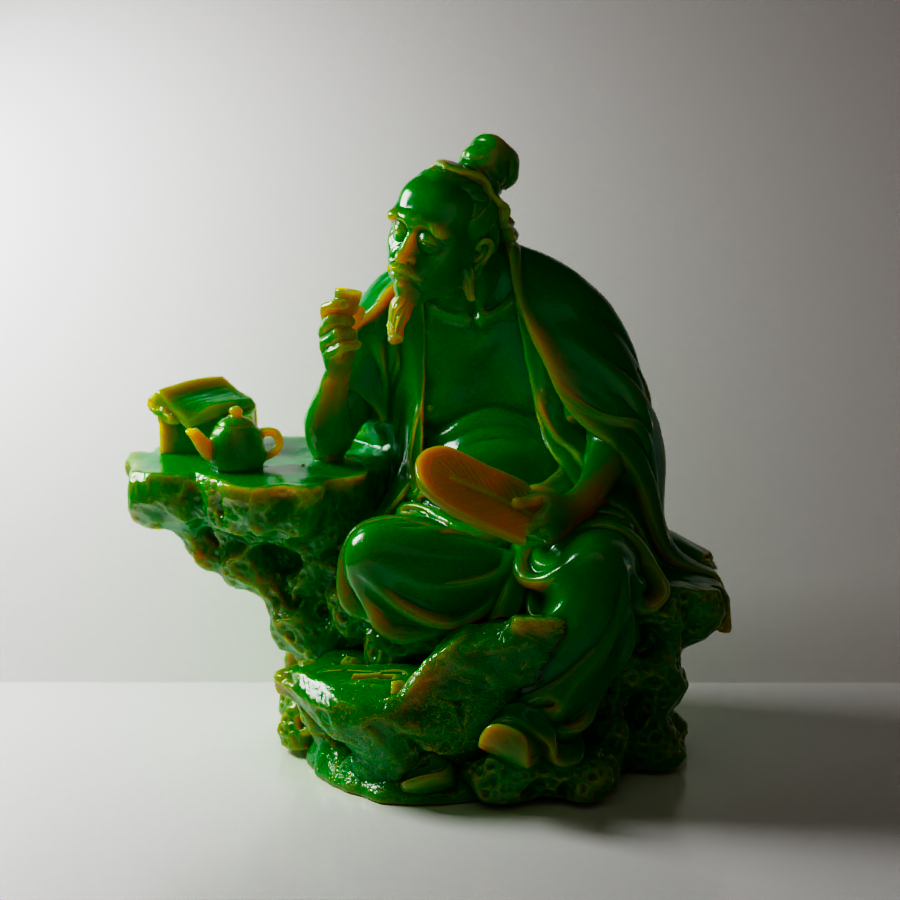
Now beside they are both physically plausible, the one that takes Anisotropy into account does simulate something that is more likely to be found in real world.. like with usual Jade materials used for this kind of statuette modelling while the other approaches a completely different material that's hard to find anywhere.. so one would have to step back and tweak further Color/Radius params to get a more plausible appearance. However as you can see green is green and red is red where light passes through the object so in a certain way it's still fully controllable as appearance.
Of course because this one doesn't obey Anisotropy we can try to enlarge its scale to see if it's getting closer to the (Sony)Imageworks model. To some extent it does but the look is really different anyway. Take care that anisotropy is still correctly applied in the random walk .. it's just that it's not used to convert Color/Radius to Absorption/Scattering sigma volumetric parameters which are then those actually used in the SSS simulation.

We then have a third remapping we called 'Pixar' which is also the one used in Blender. Btw, all three are easily selectable from a drop down menu. This one is close to the Disney model but needs a very big radius to let light pass in, so keep that in mind when you gonna use it. Overall coloration is an average between Color and Radius colors and to some extent it looks it may be the most expected one.
We see with a certain remap is easier to simulate some classes of materials. Artistically we have now three nice options to choose from when we wanna approach a certain material modelling. The final choice may depend also by what kind of albedo (diffuse) texture map we have and what kind of SSS solution we're looking for.
Take care that Imageworks and Pixar models work poorly with negative (backward) Anisotropy.
Diffuse Contrast
This new parameter controls the Diffuse SSS lookup.. meaning, when the SSS ray re-emerges from the surface we evaluate there a simple Lambertian model. Turns out that this is not that close to real life materials. Because of this we added a Diffuse Contrast parameter to be able to control the light terminator. Keep in mind this is not for when you mix SSS and the Diffuse lobe, this is the Diffuse we evaluate from SSS, so it's part of the SSS lobe.
Here we respectively use 0.5, 1 (default plain diffuse) and 2.0. See how the light terminator (where it starts kicking in shadows) is different.

Indirect Sampling
As we said above, we spent big time optimizing SSS under indirect lighting with high bounces (>2). This is because Arnold shots only one single ray for any indirect ray and for SSS this is a bit prohibitive because generally SSS really needs an high sample count to converge together with reflections/refractions and plain diffuse stuff. Effectively, it's not rare to have SSS with a couple of sample per pixel more than any other ray.
Real problems then occurs with high GI depth because in the zones where SSS is indirectly sampled, it results in some undersampling.. ie. it will still look coarse when all the rest of the image is practically converged.
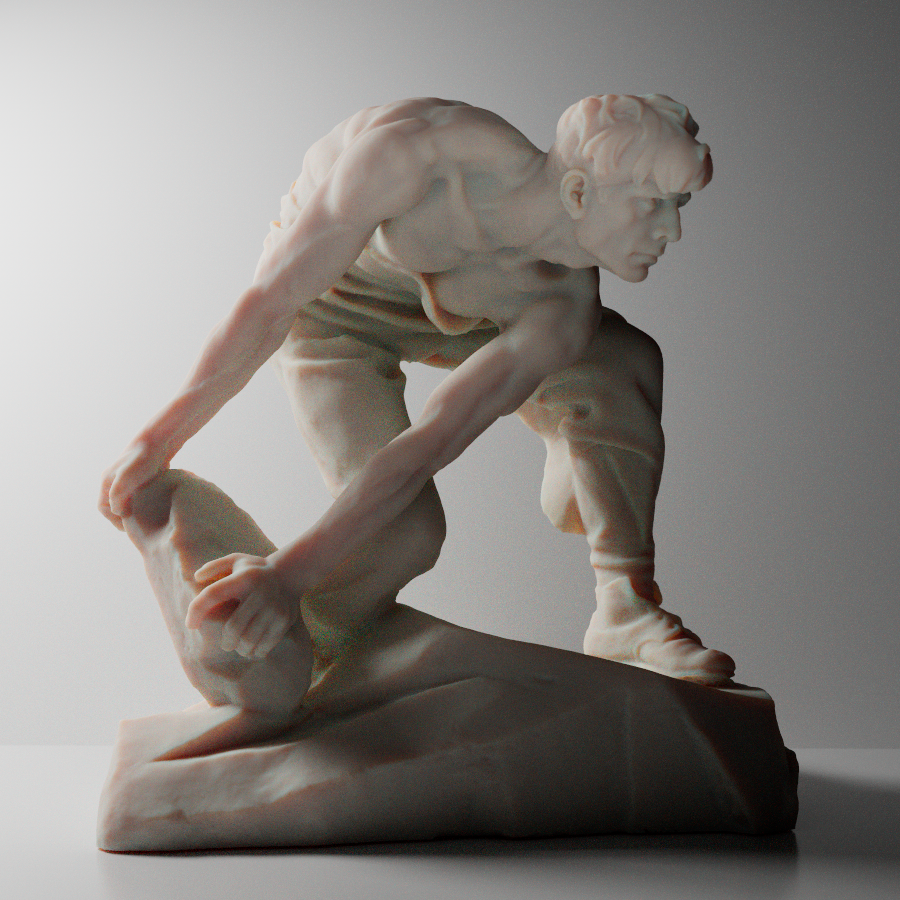
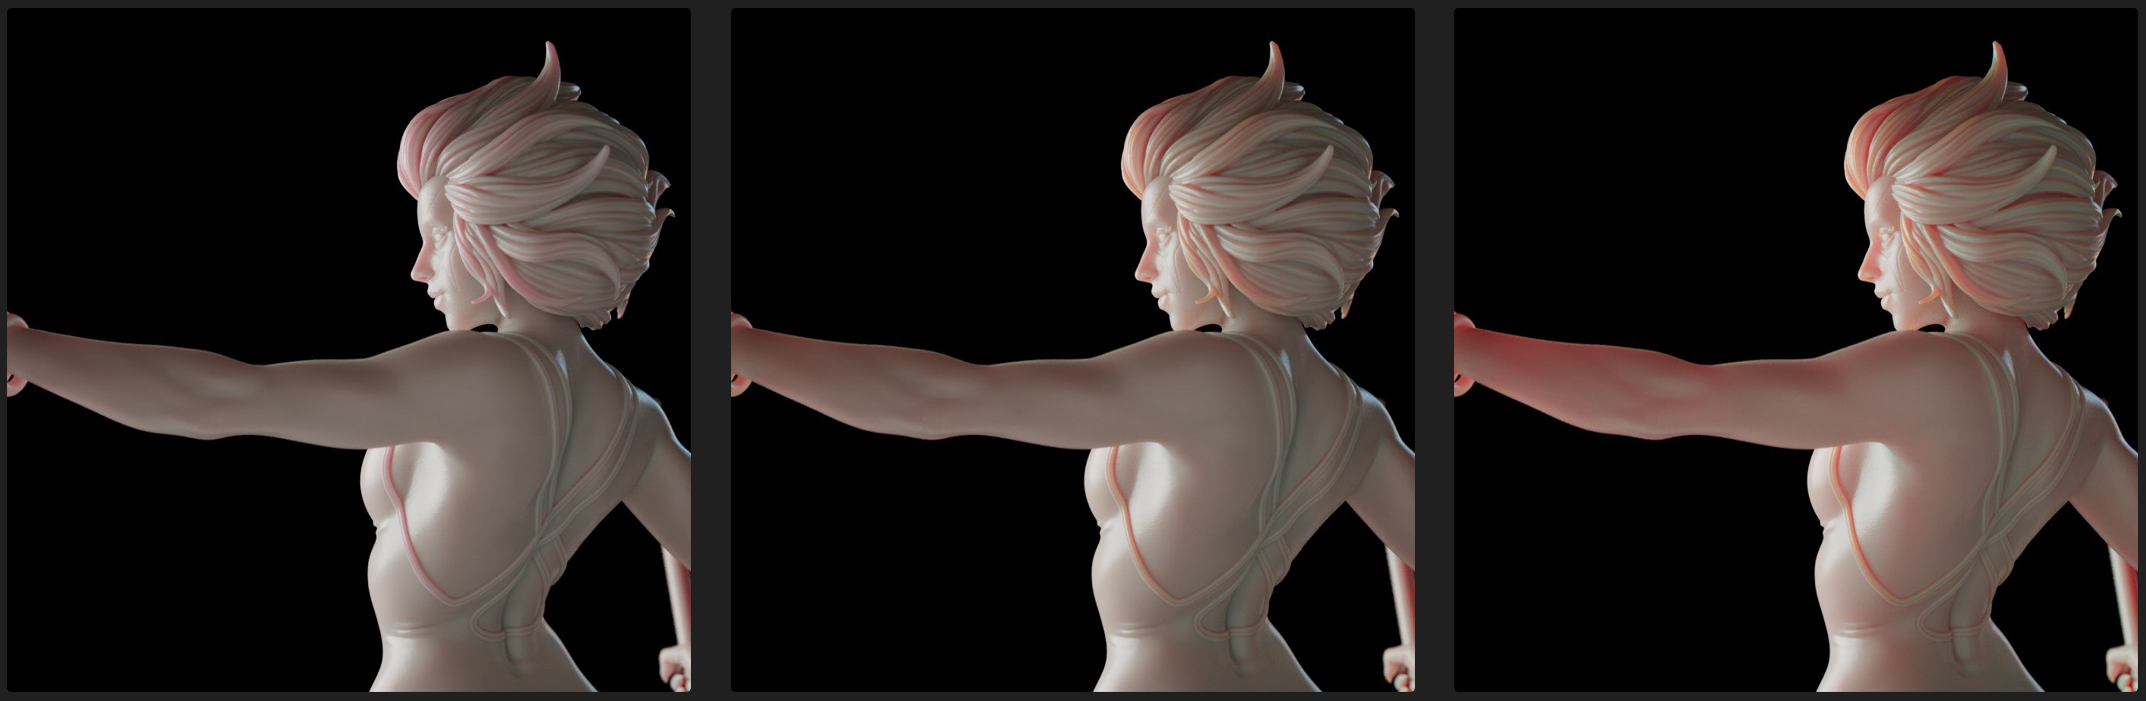
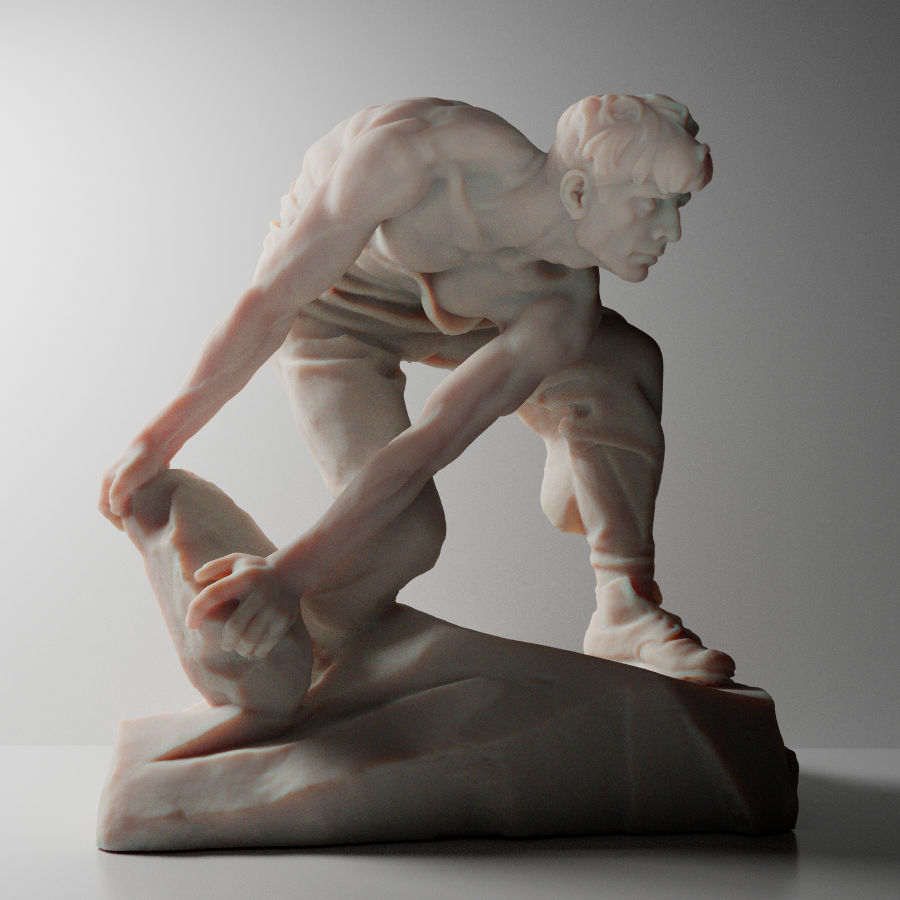
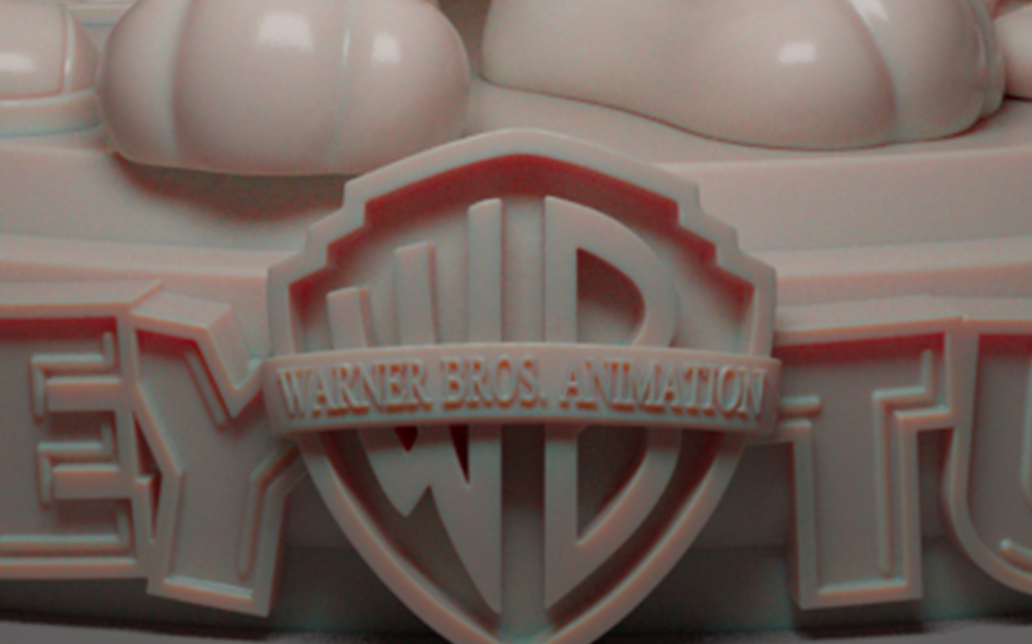
For example, it's easy to see that all the parts exposed to direct light that have no indirect bouncing are almost fully converged (ie. noise free) .. just look at the object model back and right arm exposed to light for good convergence while look at its right knee where it does occlude with the stone for some still raw SSS solution. Situation here is that this image is rendered with already 6x6 AA samples and also 4 SSS samples and took 8mins to render at 2k. So what should we do ? Increase everything till all the image is converged.. and this will make render times explode !
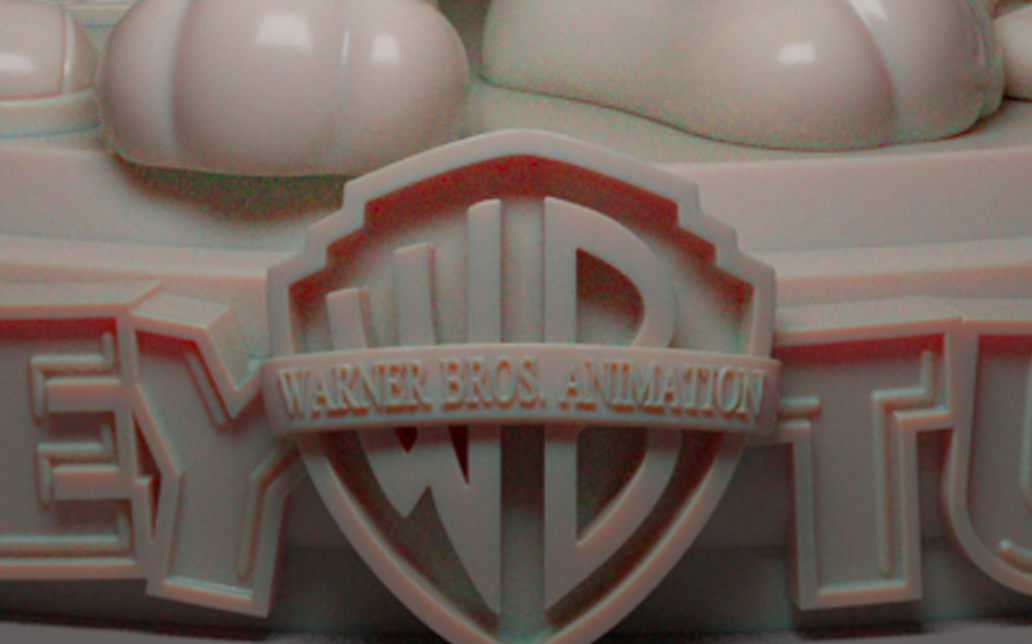
Following instead does use our algorithm to stochastically sample those indirect parts.. you can see how all the noise in the image is homogeneous.. so we won't have to cranck up samples to just let converge some undersampled parts. Also, instead to take 8mins it just took 6mins. You can also see how the image perceptually looks identical to the previous one that to be rendered at the same quality needs almost 60mins (ie. 10x speedup) !
So we have three new parameters to control indirectly sampled SSS...
- IndirectSamples
- IndirectLookup
- IndirectDepth
We first render an image to see how it copes with indirect bounces. From there we approach a certain strategy. If we need super fast renderings, just a bit less precise than the full thing, we can go for Lambertian.. where instead to keep sampling SSS for any new indirect rays, we go for a plain diffuse lookup. If instead we wanna a better SSS solution for indirect parts while perceptually being identically to the fully sampled SSS, we go for Hybrid-RandomWalk. Keep in mind that with the shader default setup .. (ie. IndirectSamples:1, IndirectDepth:-1 and IndirectLookup:RandomWalk), it is how it was working before this update.
Once done with the initial indirect ray strategy, in case of anything non-Lambertian, we have IndirectSamples available. What this does... is to free Arnold from doing just one sample per indirect ray. Arnold will do as many samples as specified there. So we choose 'Hybrid-RandomWalk' and then if we see that our indirectly sampled SSS parts are still a bit raw, we can start carefully increasing IndirectSamples param until we match the convergence of the rest of the image.
Below we show some other comparisons. On the left column, we have the default scenario (ie. what happens with both default rombo and Arnold SSS), on the right instead we have our rombo improved indirect SSS sampling. You can see how better is the SSS solution and how times are really faster too. And while the Lambertian solution gets a bit darker, the Hybrid-RW is perceptually the same as the default random walked SSS (just with better quality and reduced render times.. because effectively the 'reference' rendition on the bottom left is still coarser even after 22mins).
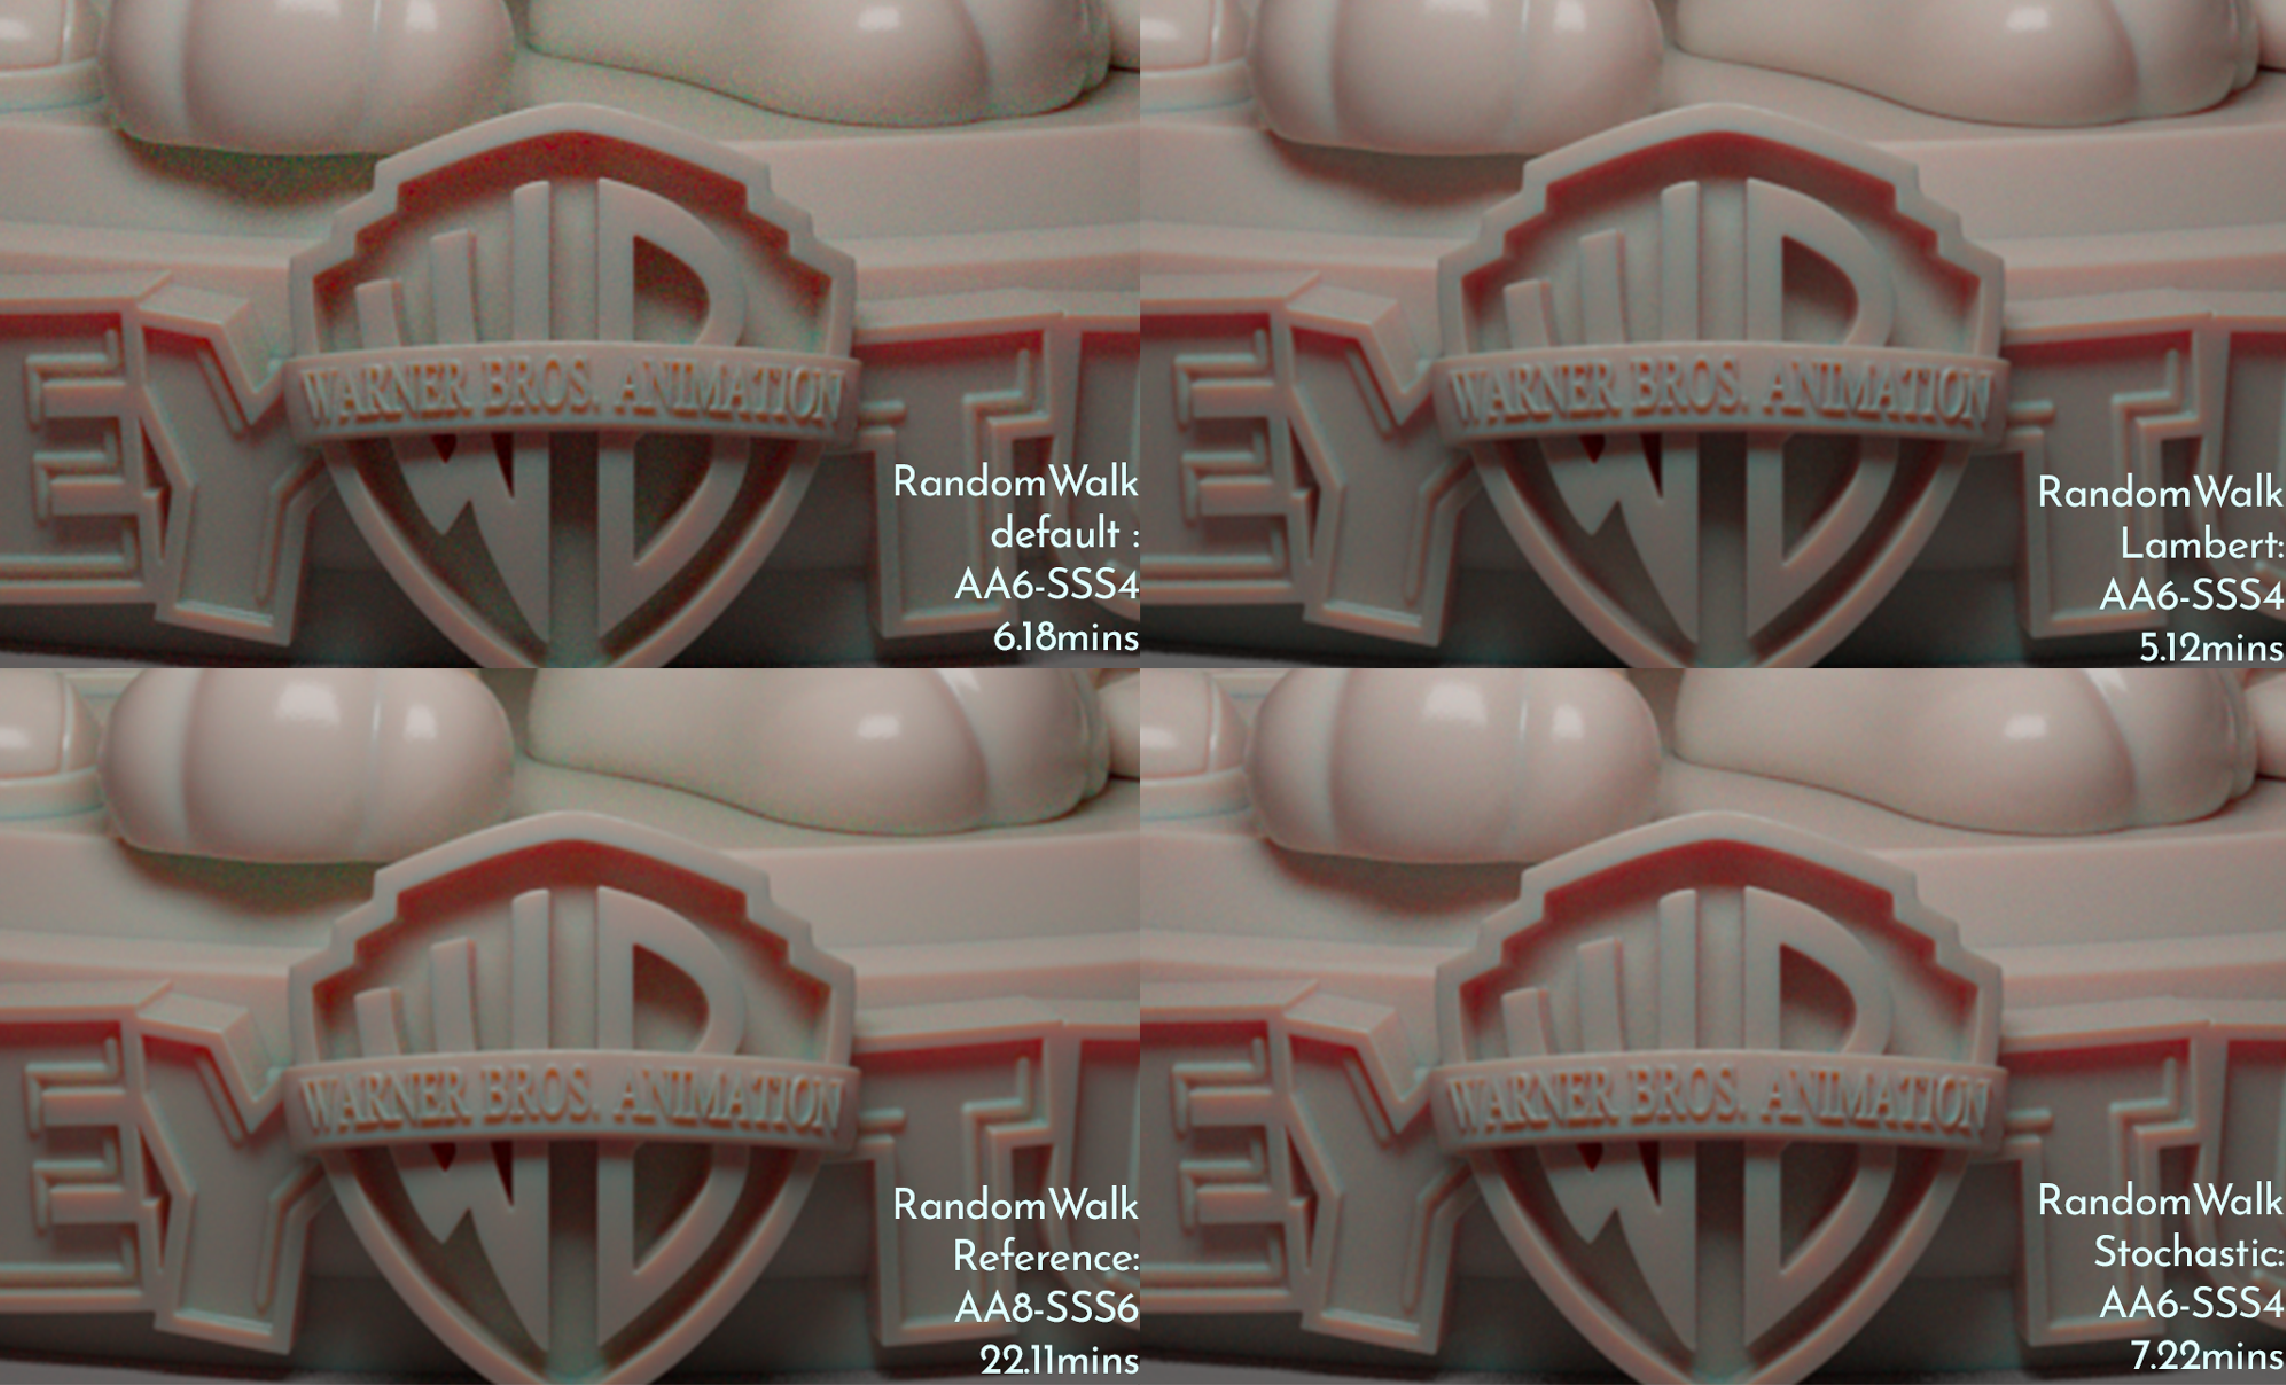
Take care the difference in quality is really huge as you can see below.
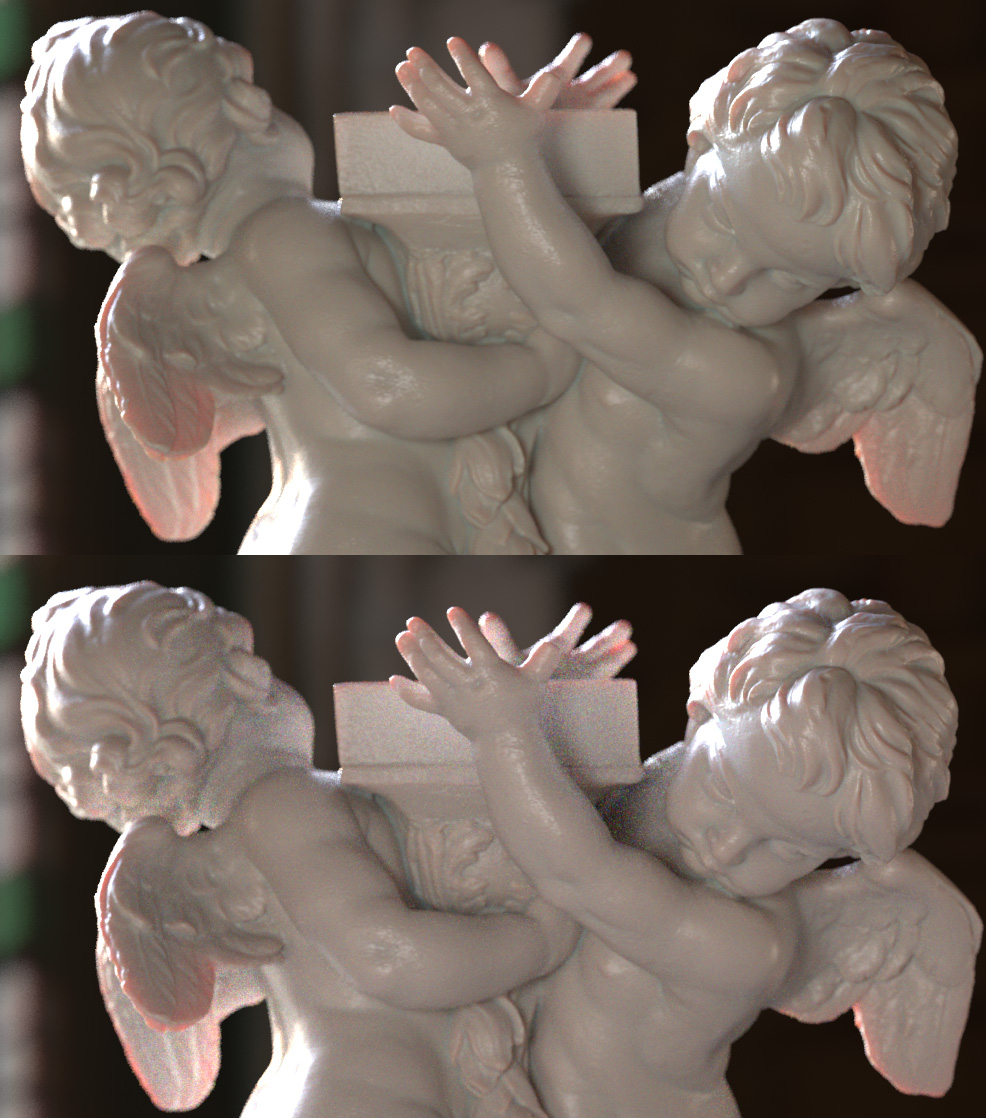
This is instead a comparison between rombo and Arnold SSS. We're already 2x faster with the same settings and way better than Arnold default SSS in indirect zones. Note also how the left angel wing exposed to direct light is almost converged with rombo SSS while it's full of fireflies with Arnold. We didn't have time (or maybe was just a lack of motivation seeing already the results on equal settings) to let the Arnold factory SSS renders till the two images would have the same SSS quality but we suspect it might be even a 10x slow down compared to rombo... meaning look at the Arnold render.. it gonna take a lot of time before having it fully converged (ie. no visible noise).
Here an equal time comparison with romboSSS randomwalk in hybridmode vs Arnold rw2.. we gave them both a full 1mins to render. You can see how our SSS solution quality is far superior than randomwalk2 from stock Arnold shaders.. effectively after just 1min we're almost noise-free.
When instead we want super nice color bleeding from SSS, we can use the 'Diffusion' lookup mode. This means that for the model itself we'll use Random Walk and for the color bleeding that happens (for example below) on the floor we'll use Diffusion that is more suitable for scenarios like this one. (If you need even more control just remember that on Diffusion/Dipole shaders we have also a multiplier to further tweak color bleeding).
If we instead don't want any SSS color bleeding (that will also speed up rendering), we can use the plain Lambertian option.
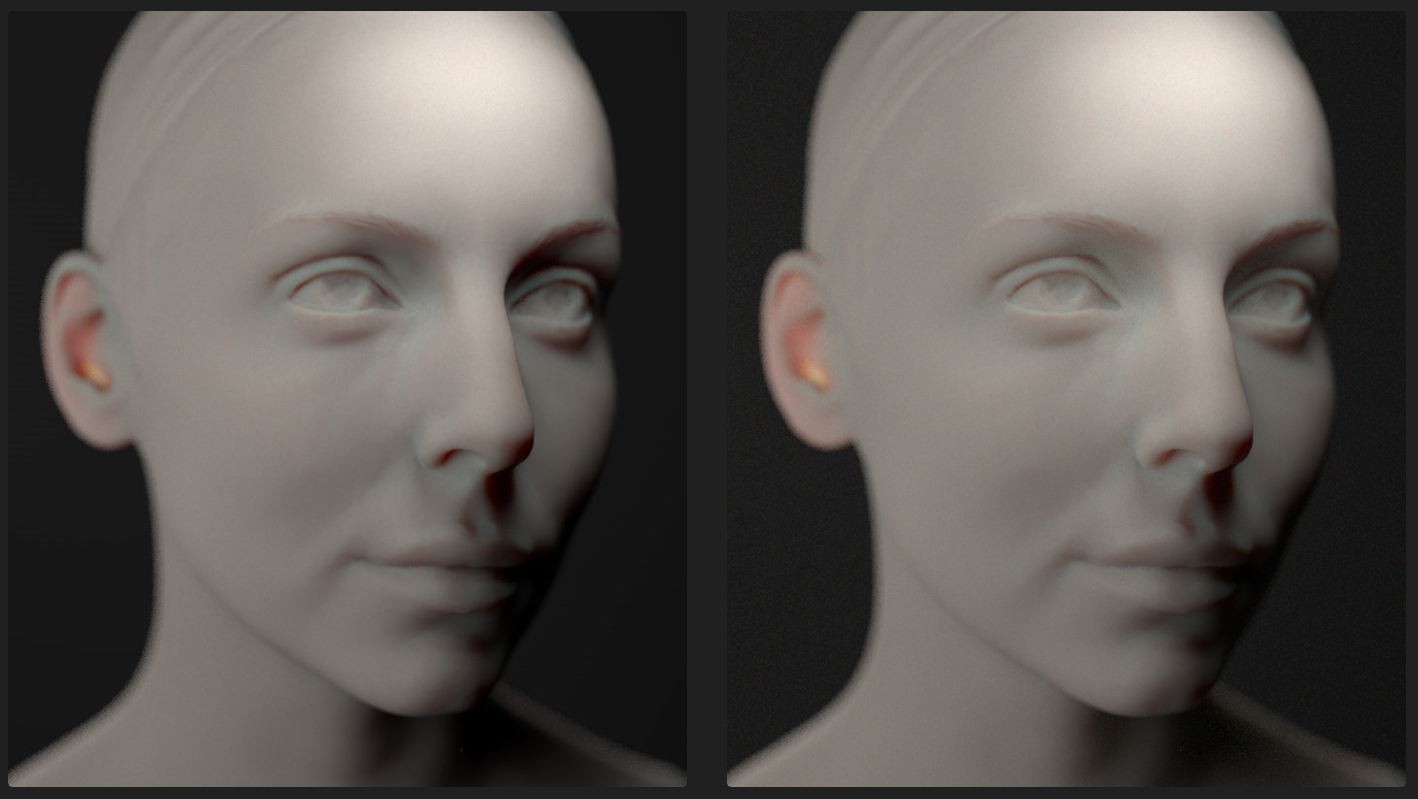
Eventually sometime we don't wanna deal with all of this and so trying to keep indirect bounces low may just give us some better SSS solution because the lower the GI depth the more normalized will be the solution quality. However sometime we may instead need super high GI(diffuse) bounces because we're for example rendering an interior room but then realize that up to some depth, overall SSS looks the same while getting worse just because of the increased GI bounces. To deal with that we've the last parameter : IndirectDepth. At -1 it obeys the global settings. Zero instead means no indirect SSS and so on till capping the highest global GI depth (aka diffuse depth).
Here, we use it generally on skin because with too many indirect bounces it kinda starts glowing in some occluded parts like eye orbits, ears etc. and we instead like a more contrasted SSS solution (left).
Continuation Rays
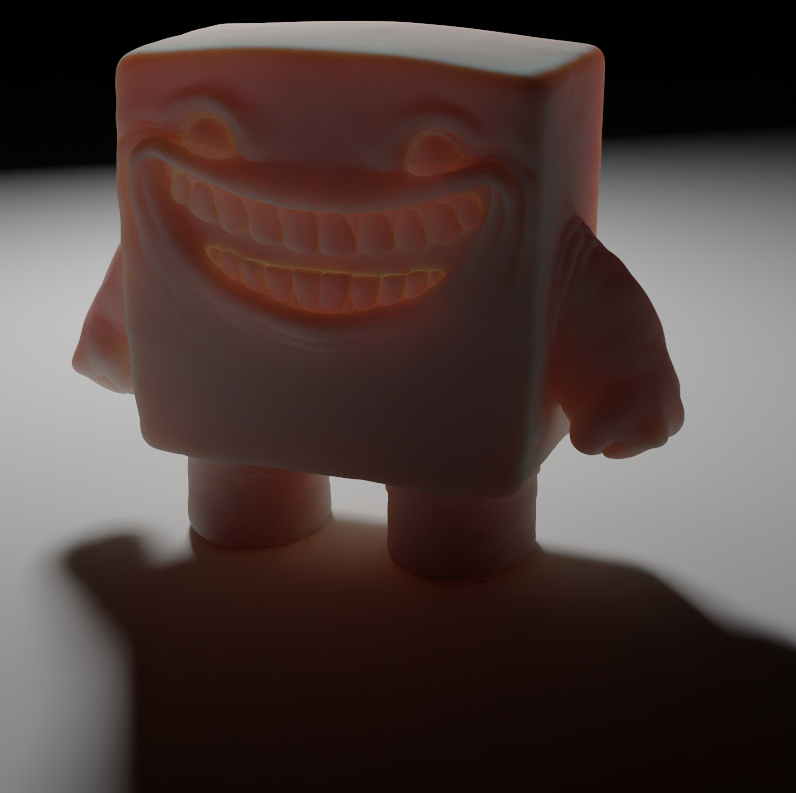
We borrow the 'continuation rays' terminology from PRMAN where rays that hit a front-facing poly or a different geometry than the one from where the rays originate are continued like no intersect was found effectively minimizing the troubles of needing an enclosed manifold for proper volumetric random walk. It is still better you reason in term of 'closed volumes' to better model random walk SSS but this can help immensely.
However as opposed to PRMAN our rays are automagically continued without the need for user intervention. Below the cones are simply added into the volume and not ie. 'boolean intersected' with the volume.. so we have extraneous geometry in the volume generating that dark silhouette.
Keywords :
SSS, subsurface, scattering, Rayleigh scattering, Mie scattering, continuation rays, custom arnold shader, random walk, diffusion, indirect, global illumination, volumetric, similarity theory, albedo, arnold, arnoldrender, arnoldrenderer, shader, material, reflect, reflection, microfacet, arnold shaders, arnold download, arnold materials, arnold renderer materials