
The yarn-based material has been updated with:
- sheen and reflection lobes
- build-in patterns with HSV controls
- an all new phase function for better controllable fiber scattering
- a roughness patch size to better control fiber roughness and specular pattern variations
- an indirect glossy versus indirect diffuse parameter to better approach some kind of textiles
- better overall controls over pattern influence when dealing with reflections and transparency

Let's see the main parameters one needs to know well to tweak the main fabric appearance.
They are indeed those that belong to the Yarn Structure and Yarn Speculars rollouts.
In the Yarn - Structure rollout we have parameters that deal with the underlying fabric BRDF model.
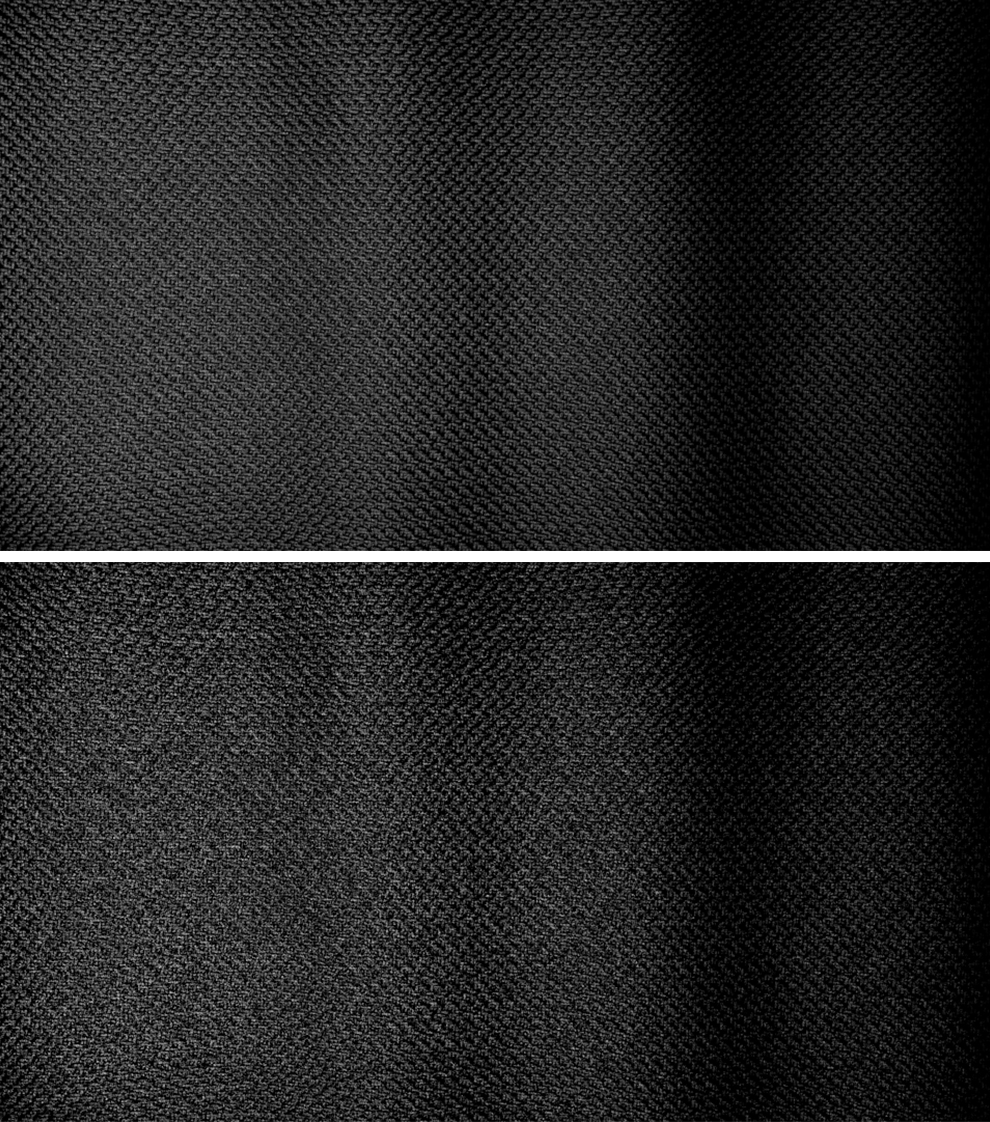
The Scattering param controls how much light is scattered into fibers. The more the light is scattered into yarn fibers the less will be scattered back to the camera.. meaning less evident reflections. Let's say we have a very reflective fabric like for example silk shantung.. increasing the scattering parameter will make the reflection less bright and contrasted because much light is absorbed instead of being reflected back into view. Below we are passing from a 0.25 scattering value to a 0.75. You can clearly see a dimming in reflections and an overall less contrasted appearance.
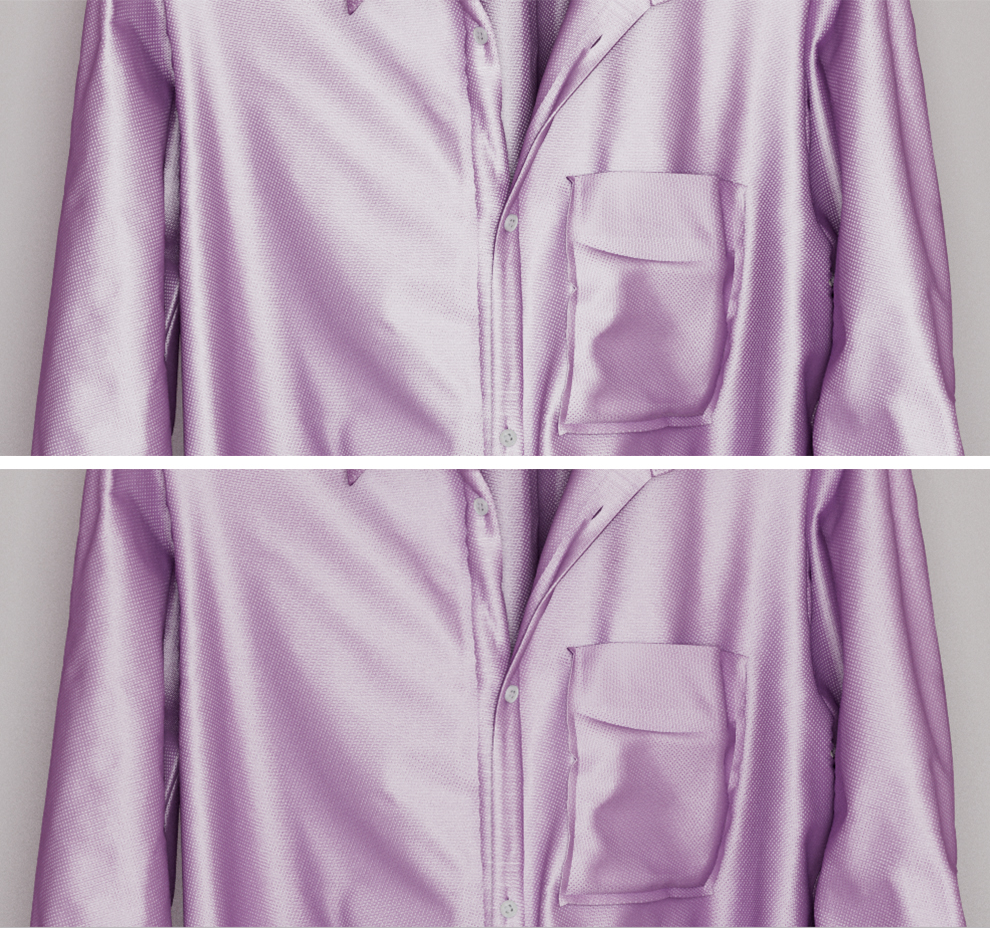
The Inclination (Narrowness) param controls (we're always talking 'visual' here) the contrast of the textile. The lower the param the less constrast, the higher the more contrasted. For example wanting to approach the silk shantung above we gonna start increasing this parameter to have more contrasted appearance. Here we are passing from a 0.25 to a 0.50 and eventually to a 0.75. The first image could be a starting point to approach rough cottons for example like those used in pajamas while the others approach a more treated cotton like those in shirts.

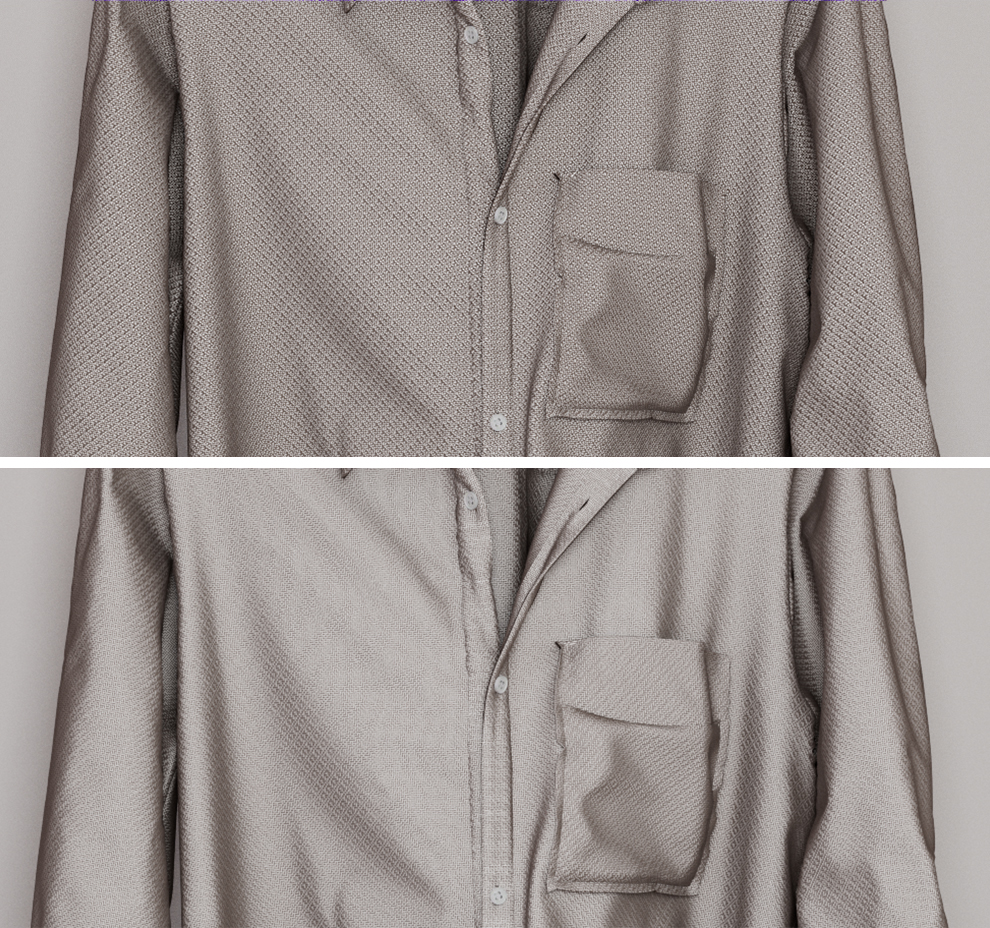
The Fibers Twist (Roughness) params controls how rough is the reflection. It deals with how much fibers twist around a yarn. The more twist the more wide reflections we'll have.. meaning the more twisted the fibers are the more light is scattered in random directions giving a less or more focused reflection appearance. Here we have param values from 0.1 to 0.75 (0.5 is the inbetween), we can clearly see that increasing the roughness param we have less details going for a roughned flat reflection.

The Curvature (Compactness) param deals with how much yarns are supposed to be close to each other. The more the yarns are close the more the reflection we'll have because yarns act like a homogenous patch scattering light in less random directions. Here values from 0.15, 0.3 to 0.8. We kept the Roughness param set to 0.1 because if we have too much rough fibers it doesn't make sense to have them too much compact because there ain't textiles like that in real world.. with a high roughness like for cottons increasing too much compactness we'll get an uncanny appearance because cotton cannot have so much close to each other yarns (while silk for example can).

Of course we cannot use any pattern we'd like (like we did just above.. choosing patterns randomly :). Some patterns are characteristic of some textiles, more over to approach some kind of textile appearances we need the correct patterns that will approach the light scattering behaviour of that textile. We'll see that in a more focused post.
For the time being we just introduce the last parameter which is Enforce Compactness. This will give you a shorcut to make yarns more compact without touching the above parameters. Eventually all the parameters here are not indipendent.. making up the whole BRDF model. Nor they are necessarly linear.. a value of 0.25 is not half the brighness when dealing with compactness or scattering for example. However their changes in appearance will become super intuitive as soon as one starts dealing with the intimate charactheristics of the textile his approaching.
It's probably worth mentioning that all the appearances above are approached just with few clicks using the build-in patterns without any texture map so it can be used also to fast prototyping stuff because without you'd need to keep tweaking a lot of textures for any change you make.
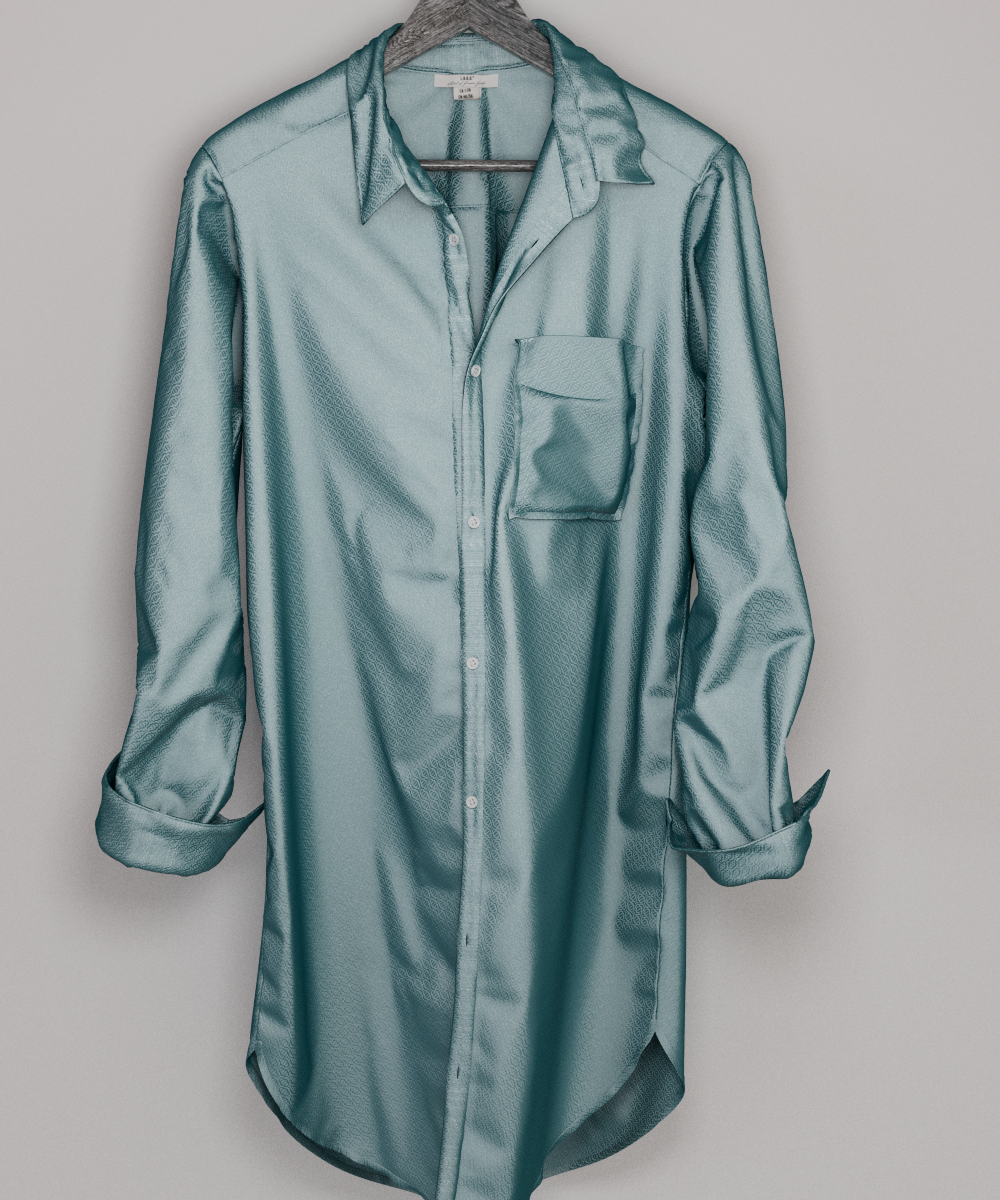
Take care that however also the geometry is important.. for example silk fabric does not behave like cotton and doesn't have a chance to have wide folds like here below so your brain may not process this as silk but as a generic shiny fabric.
---
We saw how to tweak main model parameters to get a certain appearance.
Here instead we'll deal with Yarn - Speculars.
Take care that all the above params from the Yarn - Structure and these beloging to the Yarn - Specular rollout are currently not texturable.
Beside Weight and Color, Roughness param here is one of the most important parameter to deal with when doing fabrics. It has almost nothing to do with the usual PBR roughness. It does however mimic yarn/fibers roughness breaking down the yarn pattern. Without this the yarn pattern effectively would be almost perfect without one single fiber going in a different direction than any other. This has not to be confused with the UV Noise that belongs to the Pattern rollout. Those parameters will break the pattern itself, while this is adding fibers noise to the pattern making it more real life.
This is how a build-in pattern specular AOV will look without roughness at all.
This is instead how it will look with roughness set to 0.25 and 0.5 respectively. Now it starts looking like fabric.
The above images have the Rough Patch Size param set to 1. If you look carefully at the images you'll notice that the added fiber randomness remains generally confined between yarns.. ie. you can still see the yarns. Increasing size of the roughness patch it will start taking more yarns into account. Below with a size of 2 and 4.

An interesting parameter that belongs to the Speculars rollout is the GI v Indirect. Basically it mixes diffuse indirect reflections (aka GI) with glossy indirect reflections. The default is 0.25.. meaning a 75% of GI and a 25% of indirect specularity. At 0 it will be 100% GI and at 1 it will be just 100% indirect reflections. For example the default value is super cool for cottons. The GI lobe will give nice colors and a light appearance to your fabrics while still giving some nice detail to your reflections.
Be aware that in facts without indirect reflections only specular highlights will be modelled... ie. where light directly shines on the fabric surface while it will be flat diffuse where only GI reaches your model, that's why we leave a bit of indirect reflections to catch details also in a GI env. However we noticed that with too much reflections is almost impossible to match some kind of fabric, they give too much contrast to the shading ending up resembling always a certain kind of fabric instead of the one we may really want to model.
Just look at the example below. One looks made of cotton and the other one looks made of silk or some polyester material. Only GI v Indirect changes. So it can be used eventually as an extra parameter to give more realism and to match some kind of fabric. A nice balance will give you a chance to better match the material you're looking for.


Eventually we also noticed that for extra realism under some circumstances (for example really rough used cottons, or wool etc.) adding a bit of Sheen makes fabrics come to life. There's also a Reflect rollout where you can instead add even more reflections if that's what your material is up to (for example for laminated fabrics etc.). We won't deal with them here however as you should already know them from the Arnold Standard Material as they behave almost the same. The pattern influence in the Reflect rollout is to break your coating with the underlying pattern you're using. Take care that at full weight only coating will be visible and no speculars at all.
We've dealt mainly with reflections till now. You may have already noticed that under the Pattern rollout there're HSV params to control your pattern colors. However patterns are mainly for texture and speculars while for the colored diffuse part you may just choose to go with your own textures. After all when you have a nice generic pattern giving you speculars and bump like effects as we've seen till now just pretending to color that texture/pattern is a real scenario that happens everyday in the textile industry. You ain't forced to go all weaving to model everything with real yarn patterns. However it's also true that weaving and pattern themshelves are a secret art and you may just fall in love with that. If that's the case we support custom WIF files to support you on that. An incredible site full of hundreds of patterns (they are commercial but cost around 10$ on average) both modern and ancient is :
https://store.handweaving.net/collections/weaving-drafts-collection
Getting a base pattern and then just put on top of that your own texture is common practice. Almost all basic t-shirts have the same weaving pattern but then have different prints (that's also another place where you can use the added Reflect params) and/or are just colored differently. That's where comes handy the Diffuse rollout. Here we use for example a kind of hand made texture for our previous shirt, it comes as a texture map. All you have to do is to crank up the Blend Amount param to 1 and plug a file texture into the Color slot. You can see it is colored instead of weaved because the underlying pattern ain't matching the one with blue stripes. Of couse for the underlying pattern all parameters and what have been said above is still valid.
Also because the color part of the pattern ain't using any mip-mapping it is sub-optimal compared to using a texture map when the pattern itself is approaching the size of a pixel, you generally use weaving patterns that way when the size of the pattern is bigger than a pixel.

In the Geometry rollout (together with bump) you'll find also the Opacity and its Pattern Influence parameter. The nice thing about the Pattern Influence is that you can use it to have less opacity where the fabric yarns are present.. this will let you model a more realistic fabric opacity where highlights are a bit more opaque because there the light is hitting a yarn.

Here all the bed covers use the Fabric Woven shader; some uses a full pattern approach while others use build-in patterns for reflections and custom textures for the diffuse part. Below this we're approaching a polyester winter jacket with the following values : scattering 0.25; Narrowness 0.8; Roughness 0.12; Compatcness 0.5; we also add a 0.25 (weight) of addional reflections (reflect rollout) with a pattern influence of 0.25 and a roughness of 0.32.


Keywords :
fabric, cloth, textile, wif, pattern, yarn, fiber scattering, arnold, arnoldrender, arnoldrenderer, shader, material, reflect, reflection, microfacet, arnold shaders, arnold download, arnold materials, arnold renderer materials, maya, 3dsmax, houdini, katana, cinema4D, cinema, 4D, plugin, plug-in
Hi, just popping to say I could also be interested to have this “pattern only” feature.
Oki doki.
Right ! That is my mean. I’m really looking forward to this procedural node.
Hi,It is possible to make realistic translucent fabric with Fabric Woven?Some good examples are a lampshade or curtains lit by the sun。
Wouldn’t be transparency enough for that, like for the curtain above ?
I used to add a little bit subsurface(SSS) to fabric to make a more convincing result while it is being backlit . Just wondering is it possible to add SSS attribute to Fabric Woven shader?
Sure. We have a modular approach for these kind of things with rombotools so you can choose the SSS node you want among randomwalk, dipole and diffusion SSS.
You can use a mix2Closures to mix fabric with SSS. Because SSS is not supported as a native closure (Arnold limitation) you have first to use a colorToClosure before plug it into mix2closure, fabric is already a closure and can be attached directly to the mixer.
https://www.rombo.tools/wp/wp-content/uploads/2023/01/mixfabricwithsss.png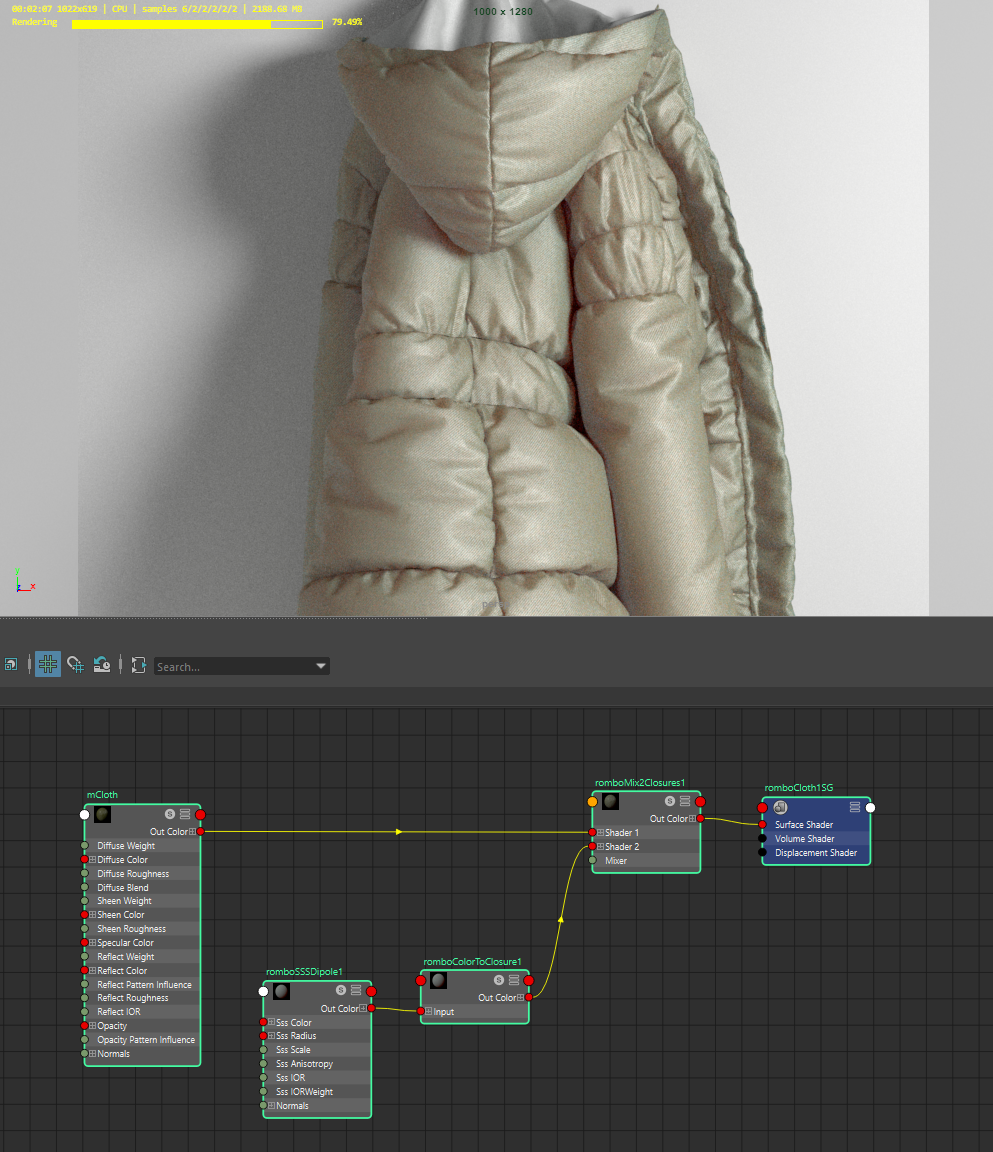
That’s just a test on-the-fly 😉 that pink skin tone comes from the Dipole SSS.
But i have a trouble, i don’t know how to transfer the weave texture to sss.
You mean the build-in weave patterns that come with the fabric shader ? I can see if we can add a procedural node that outputs just patterns so you can plug it into an sss node.